

Try Free for 1 Month
Scale-accurate pattern digitization requires a precise reference. The checkerboard reference serves as a scale so PatternScan Pro can calculate your pattern's exact measurements. You'll need a printer, white A4 paper (ideally slightly thicker), a ruler for verification, and optionally a vector program for scaling correction. With the right printing technique, you achieve millimeter-accurate results.
The checkerboard reference (175mm × 250mm with 25mm squares) is placed next to your pattern when photographing. PatternScan Pro automatically detects the reference and uses the known square size to calculate accurate measurements.
The checkerboard reference can also be used to create a calibration profile. This one-time setup per camera enables highly precise measurements for all future digitizations. [Learn more about calibration →]


Download the checkerboard DINA4 template →
Download the checkerboard US-Letter template →
Print it on white paper (DINA4 or US Letter). Thicker paper (120-160 g/m²) is better as it doesn't warp or fold easily.
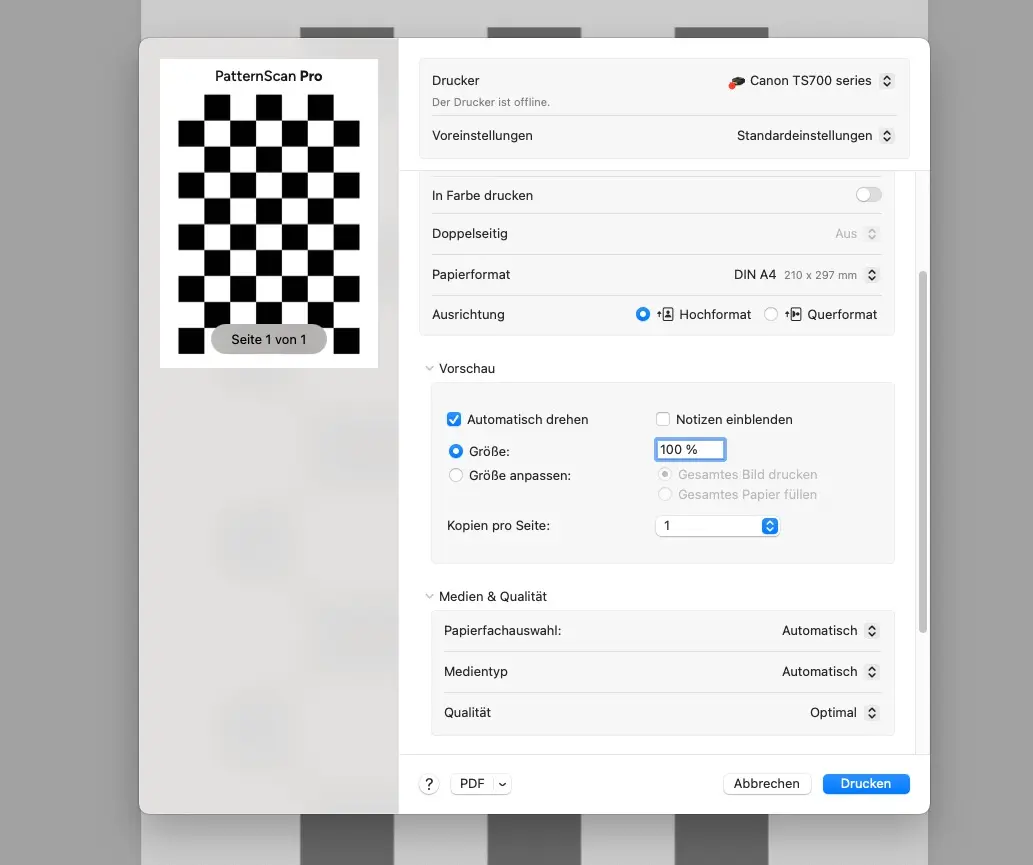
Print settings:
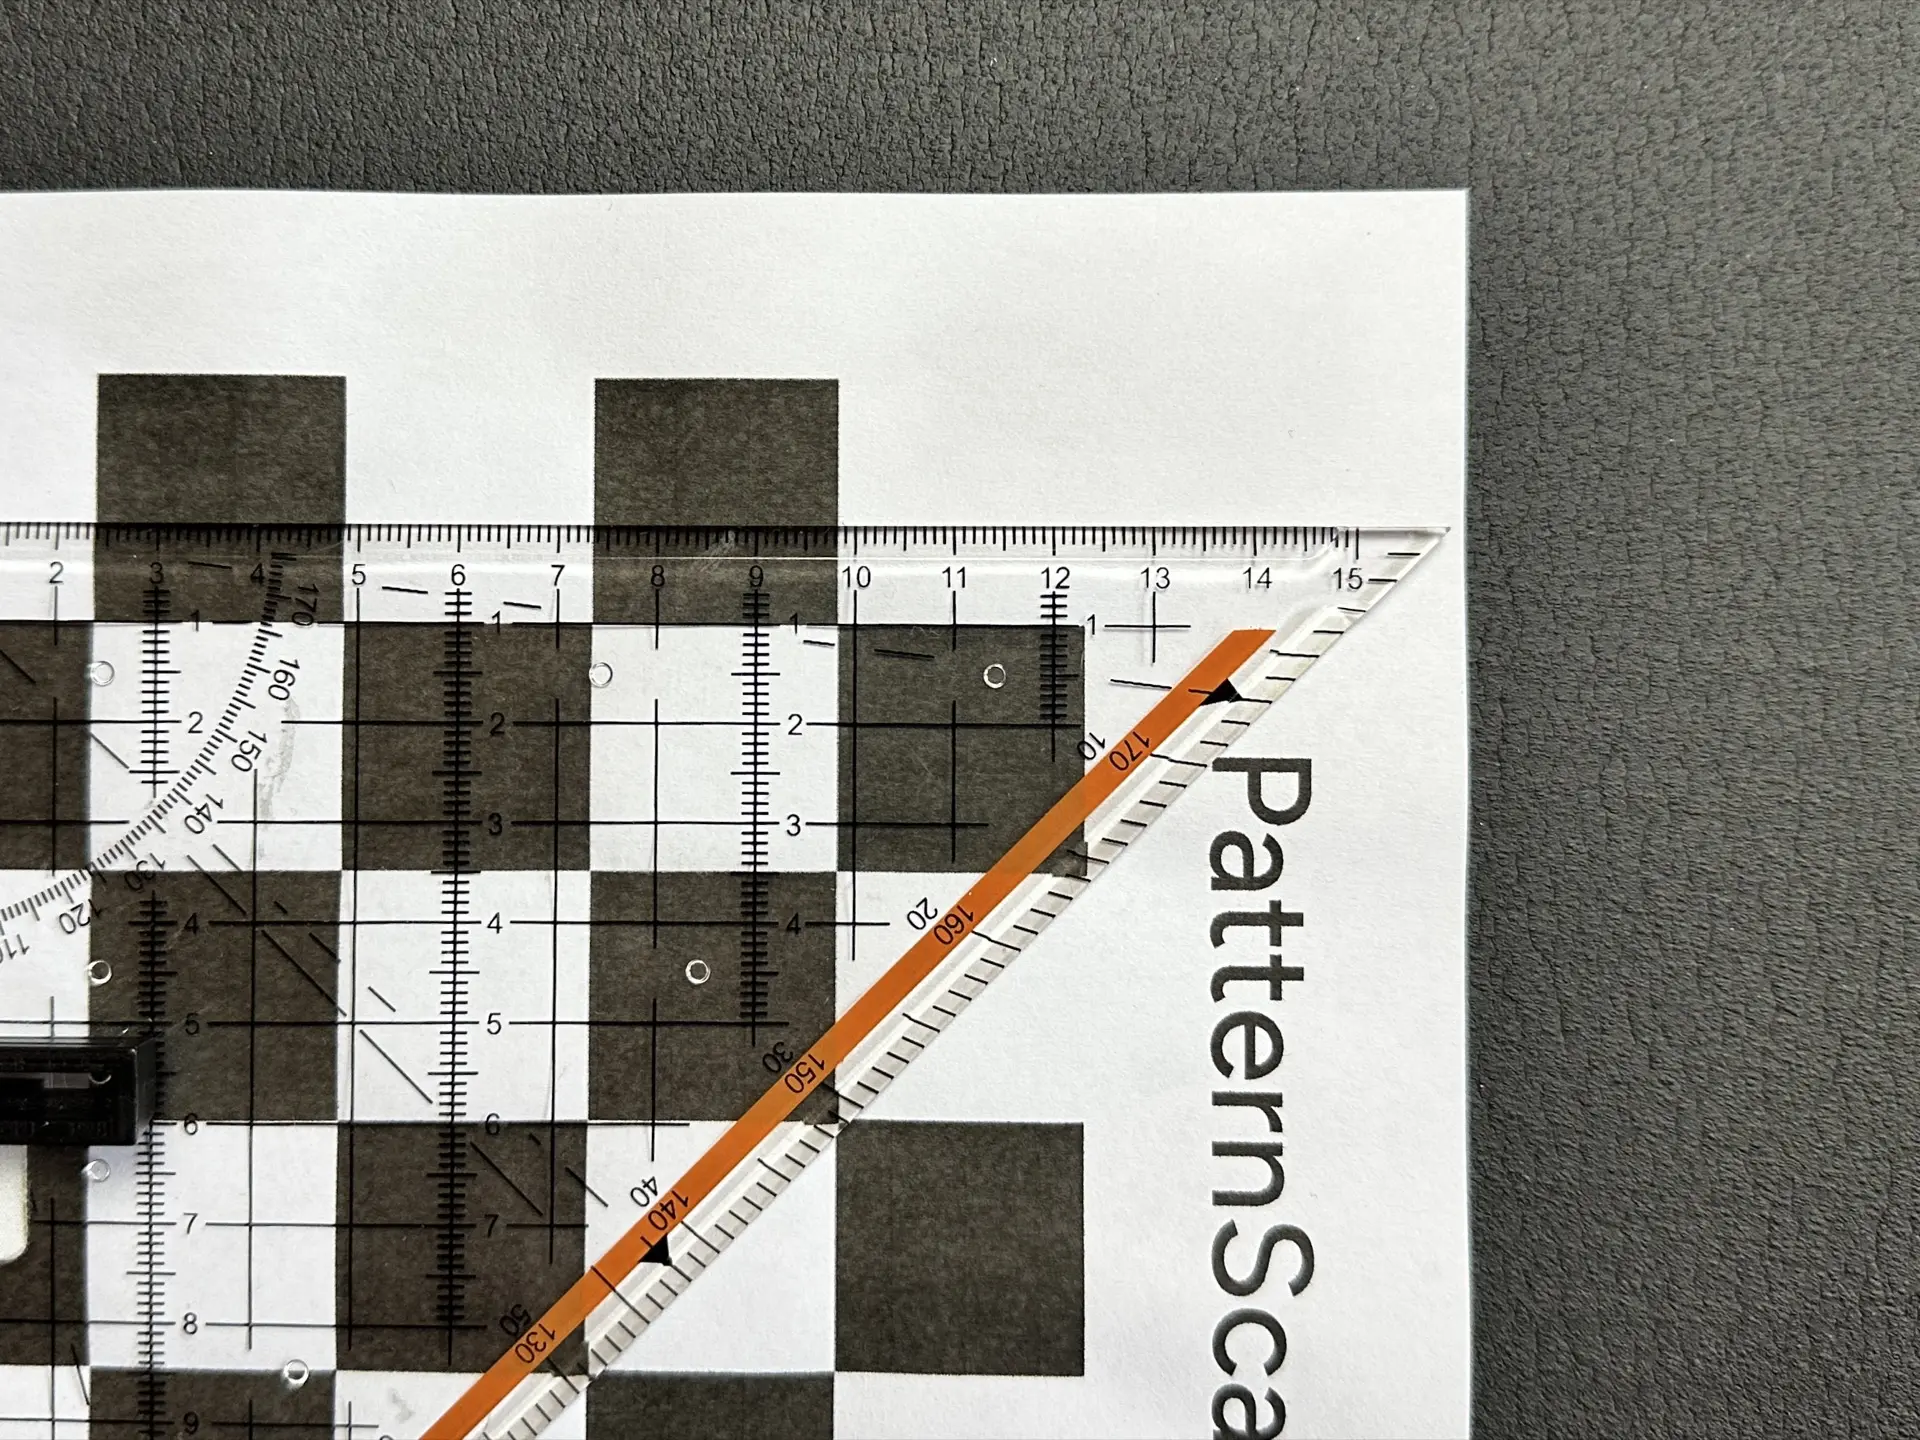
Printers often scale documents slightly, affecting reference accuracy. The checkerboard reference must be exactly 175mm tall × 250mm wide. Measure with a precise ruler.
Example: Your printout measures 173mm × 250mm:

If measurements are incorrect, correct the scaling in a vector program (Illustrator, Inkscape, or similar):
The checkerboard reference must be clean and in good condition for consistent results. Dirt, stains, or damage to squares can prevent detection.
Good reference: Sharp black squares with high contrast, perfectly flat, no creases or waves.
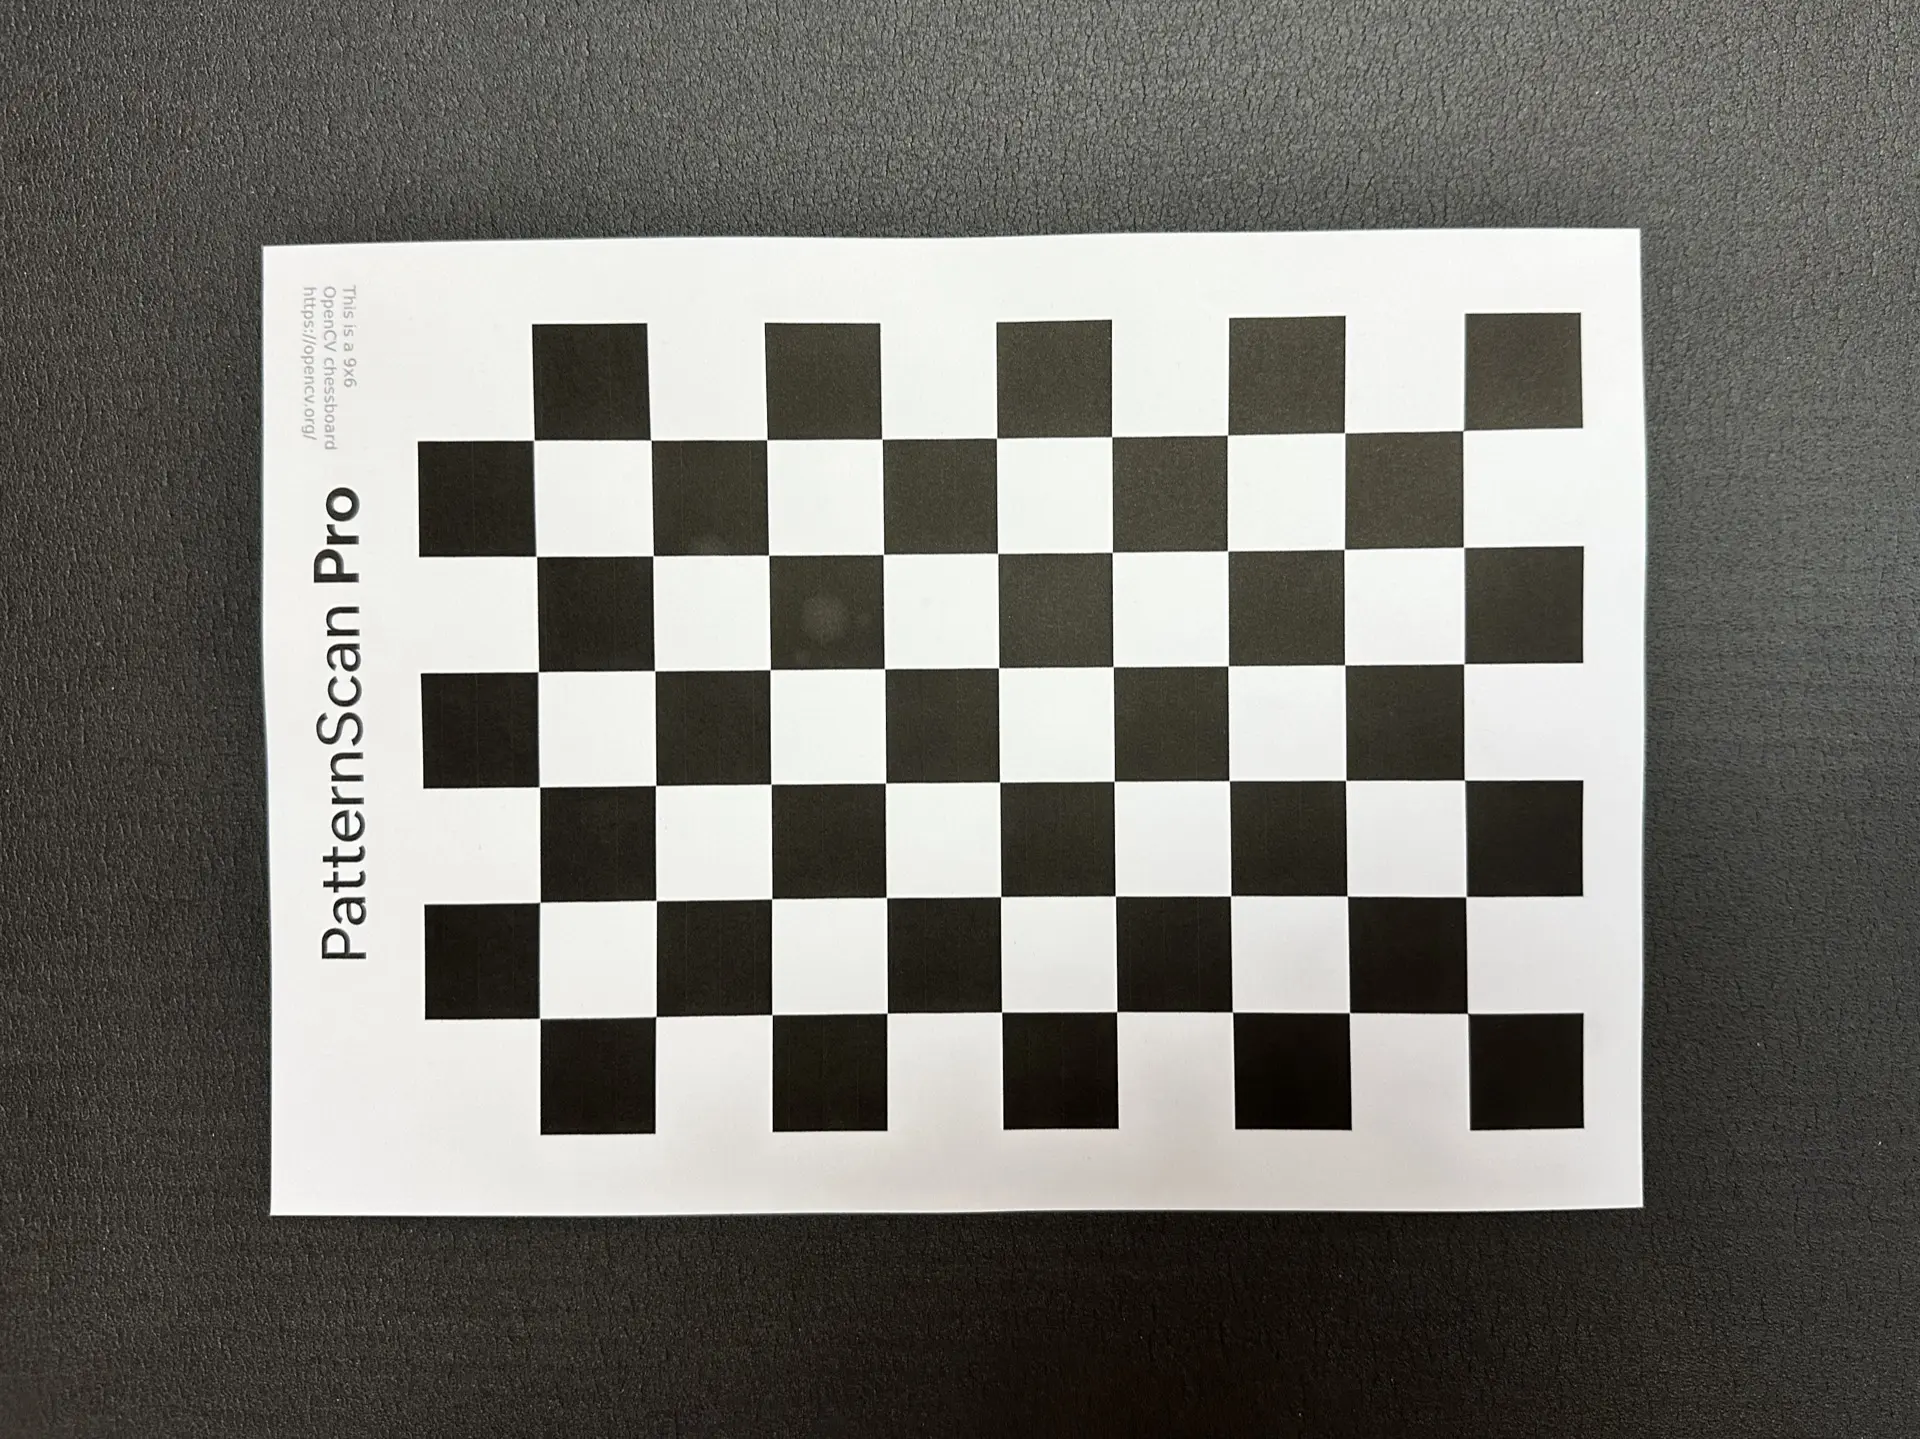
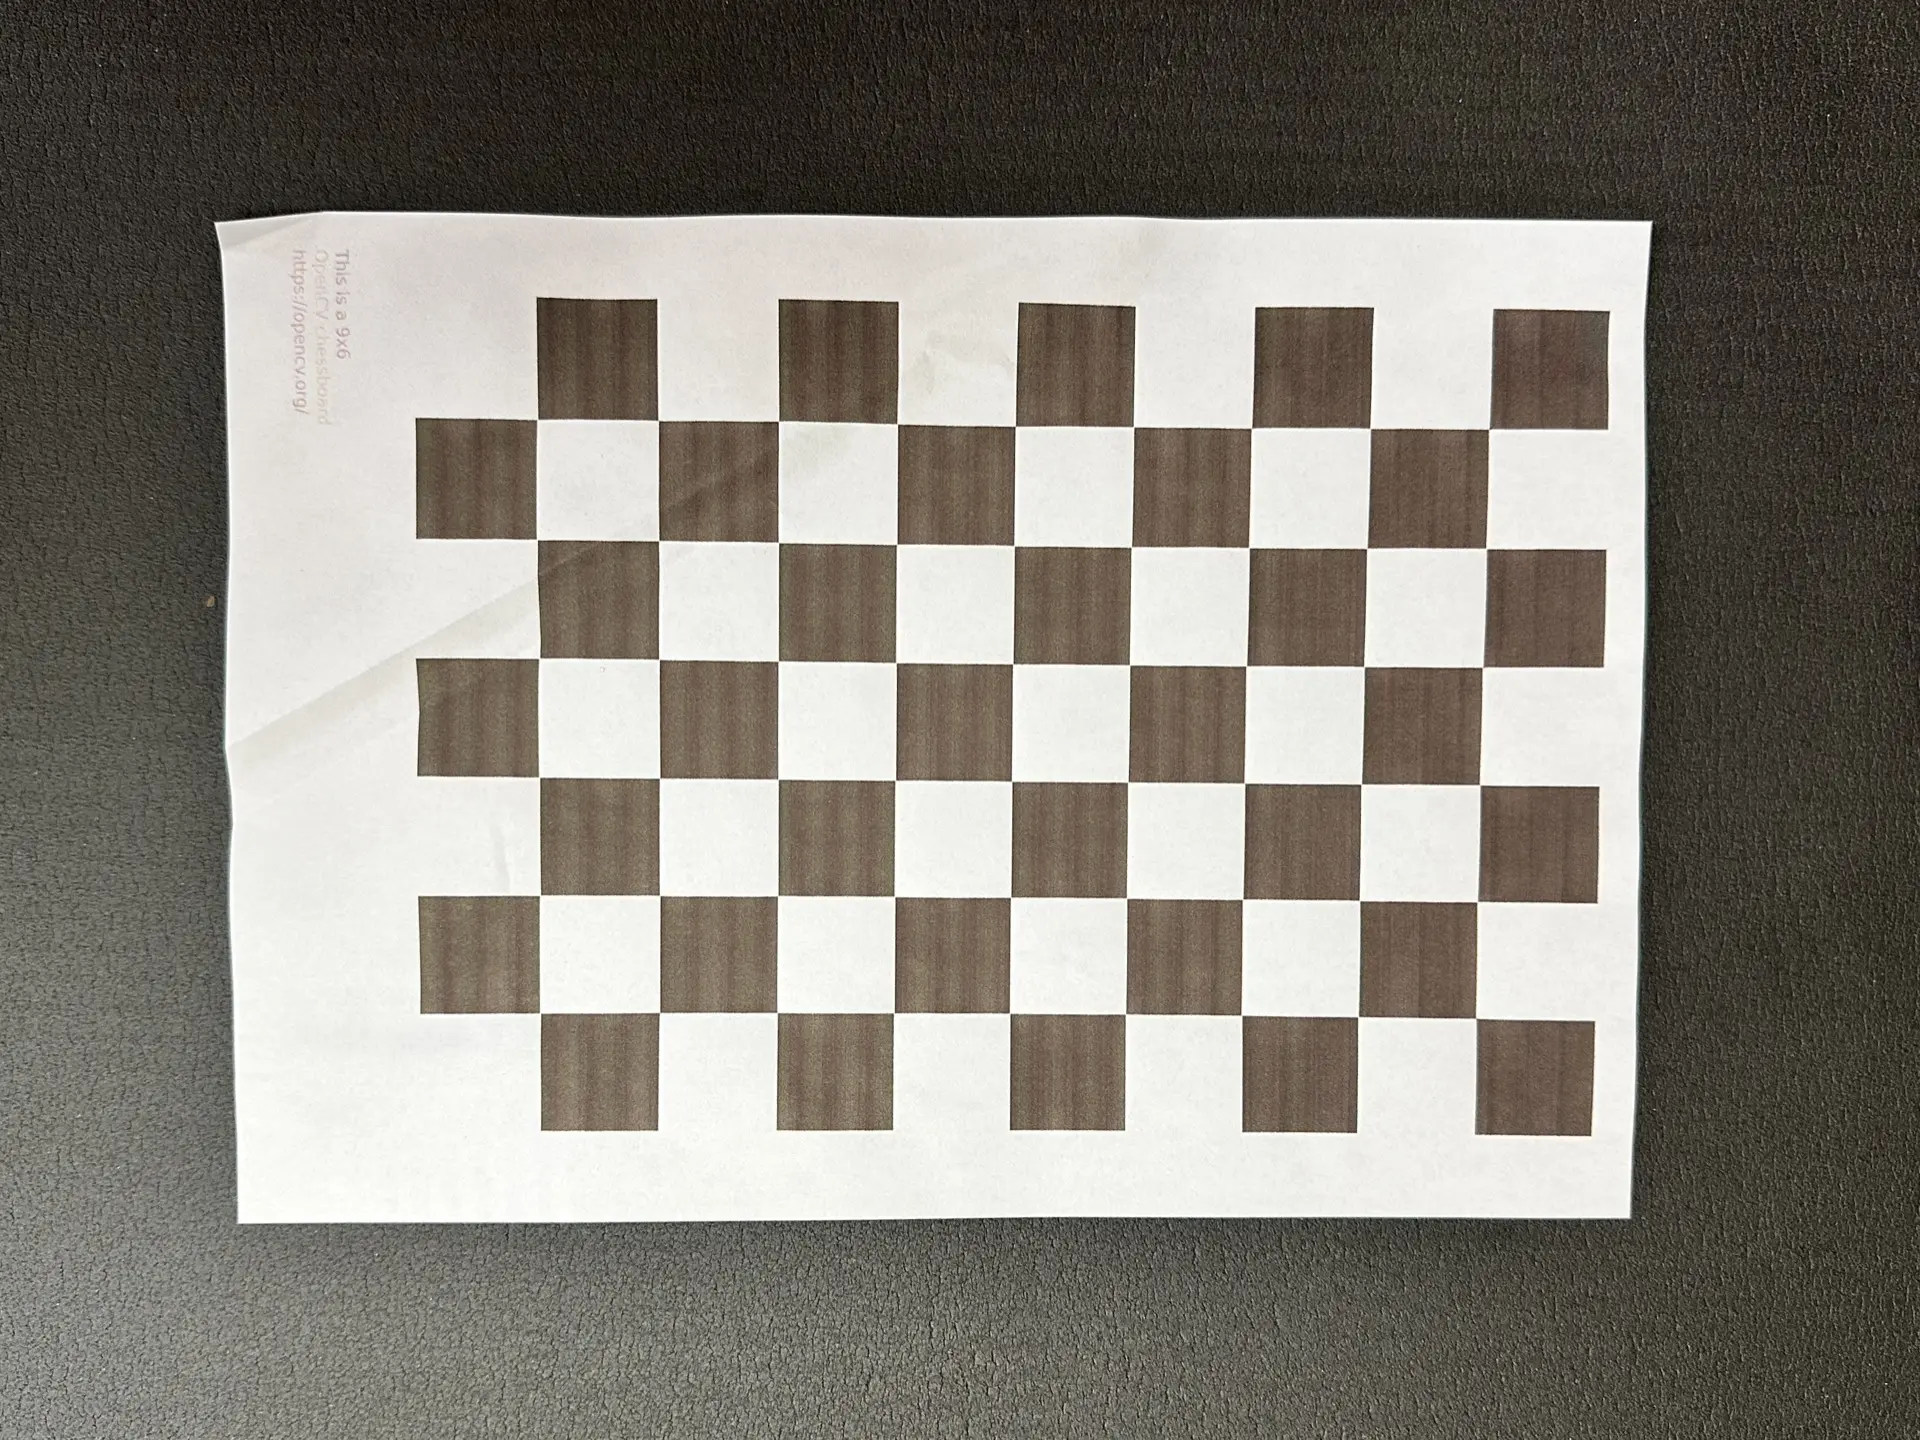
When the reference is not correct or in bad shape the detection can become inconsistant.
Avoid: Faded or unclear squares, wrinkled or warped paper, stains or dirt. Don't fold, crease, or bend. Replace the reference if visibly damaged.
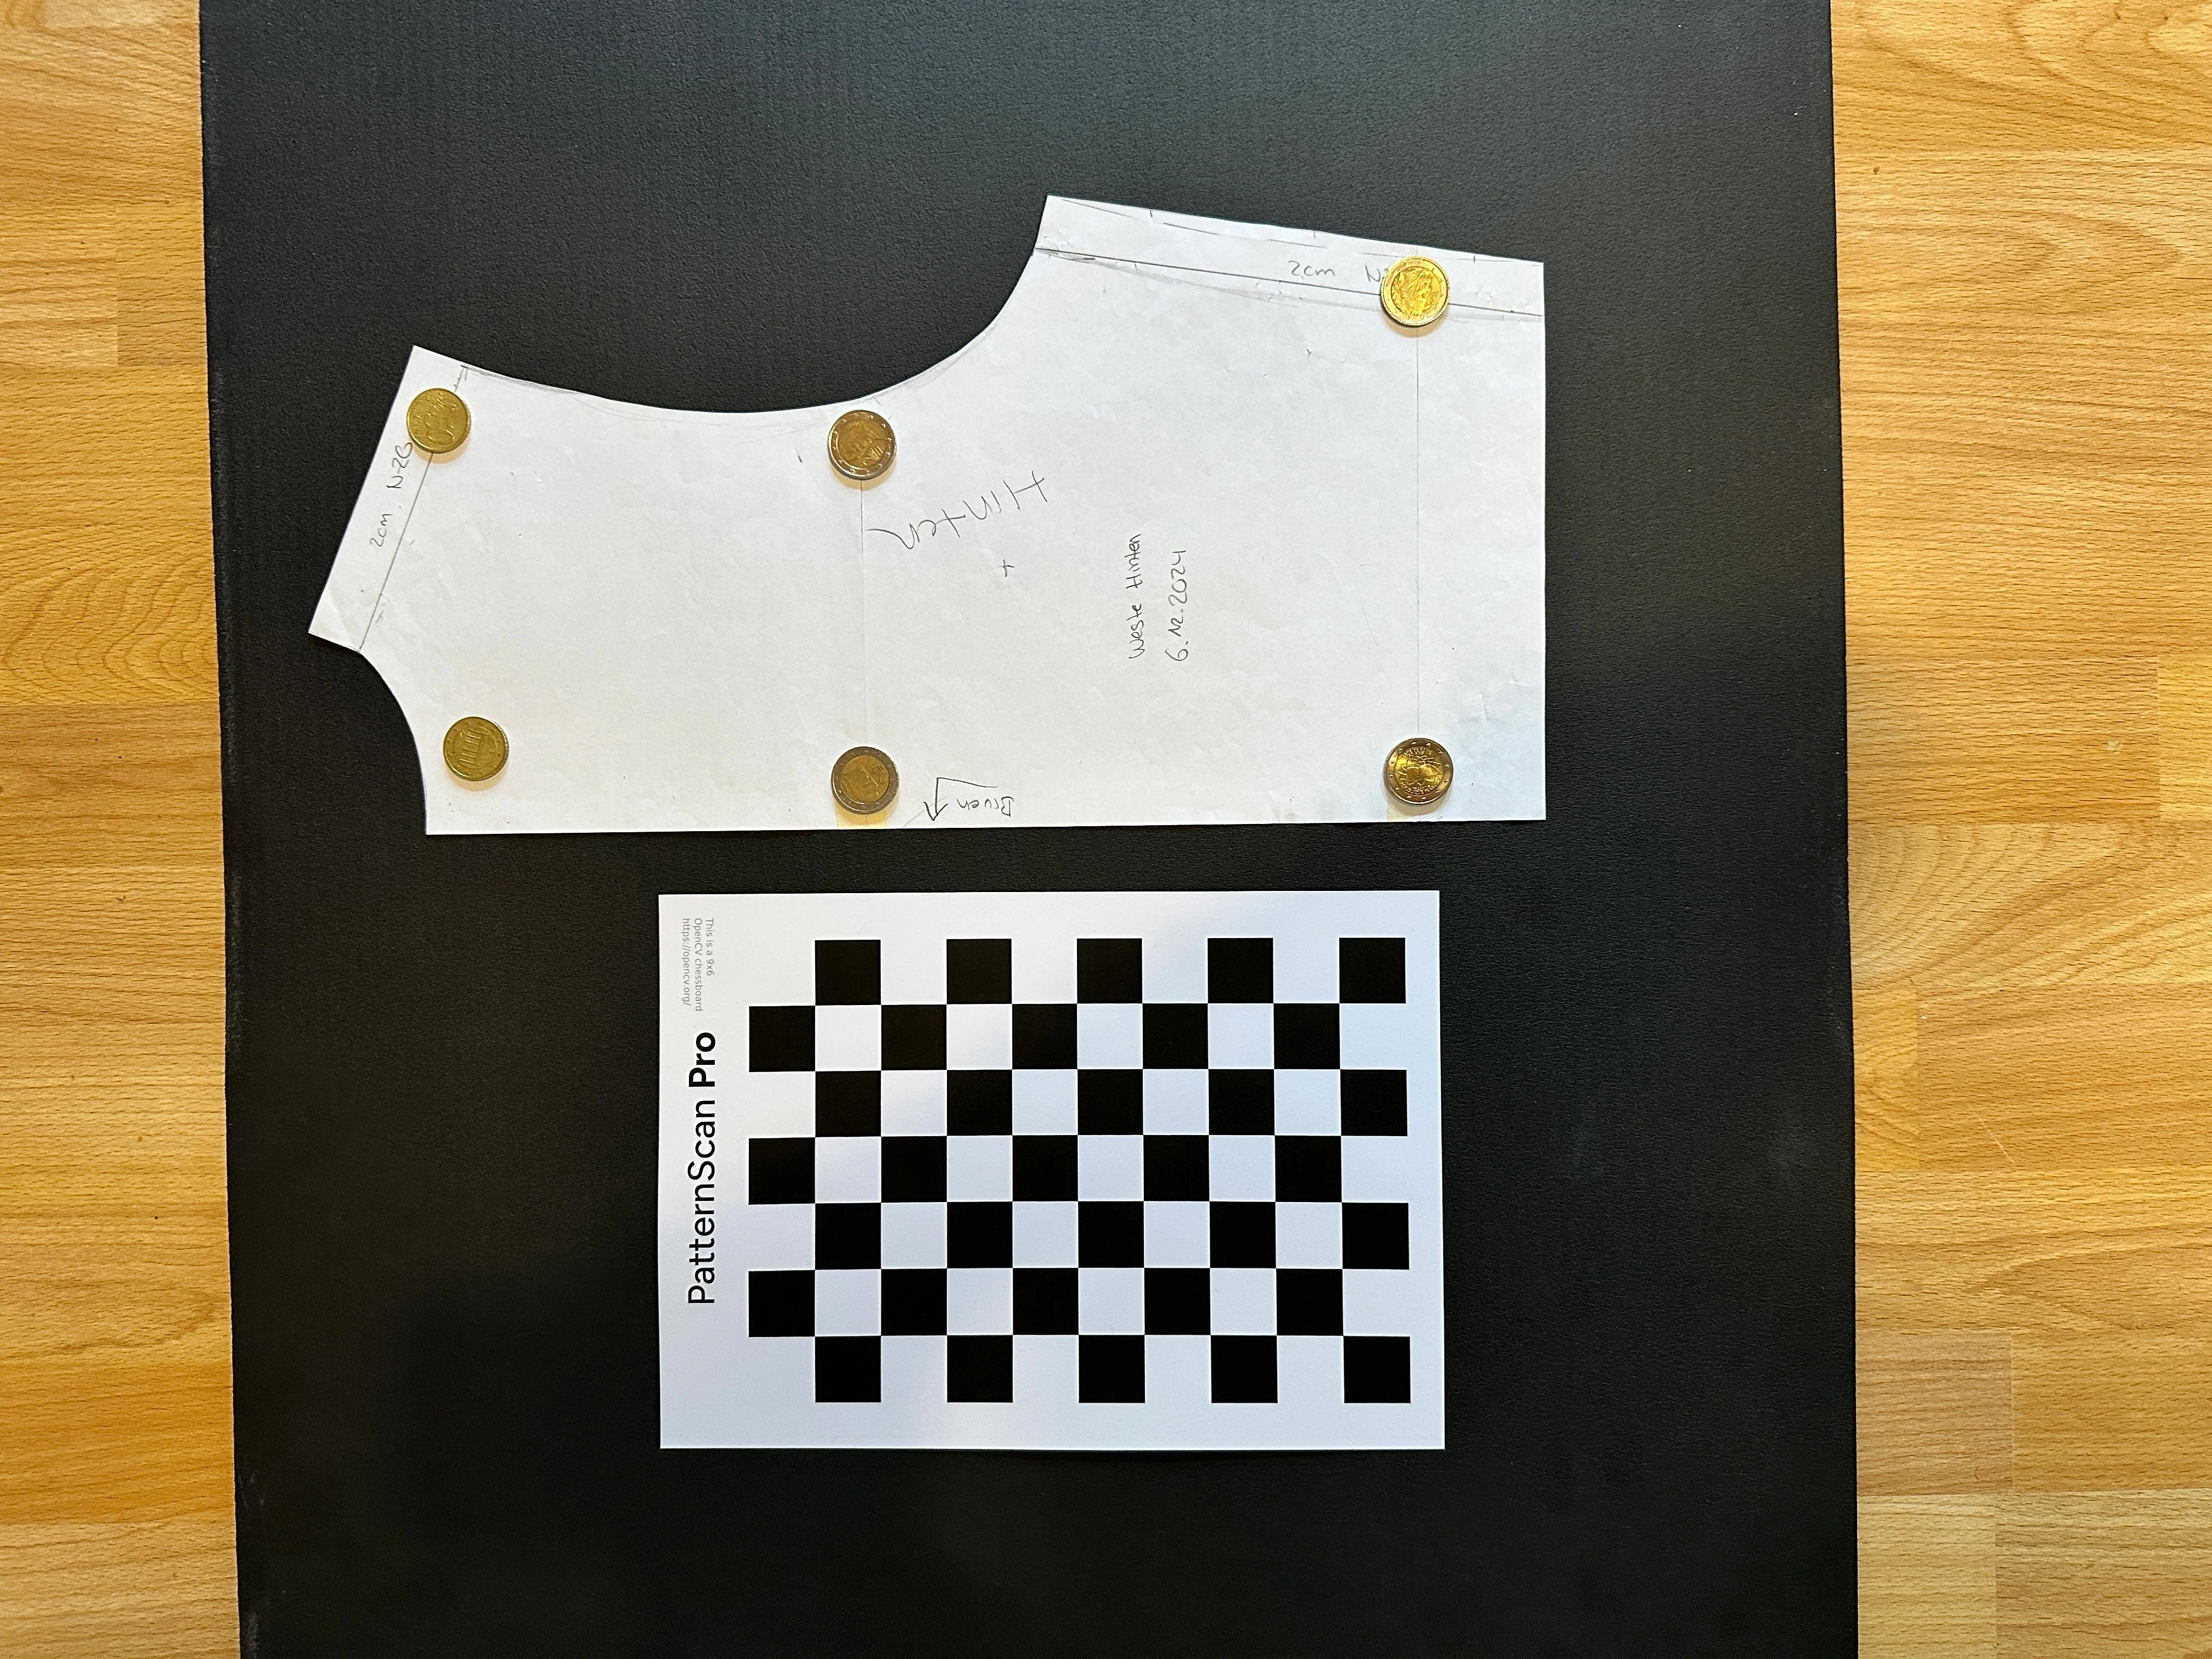
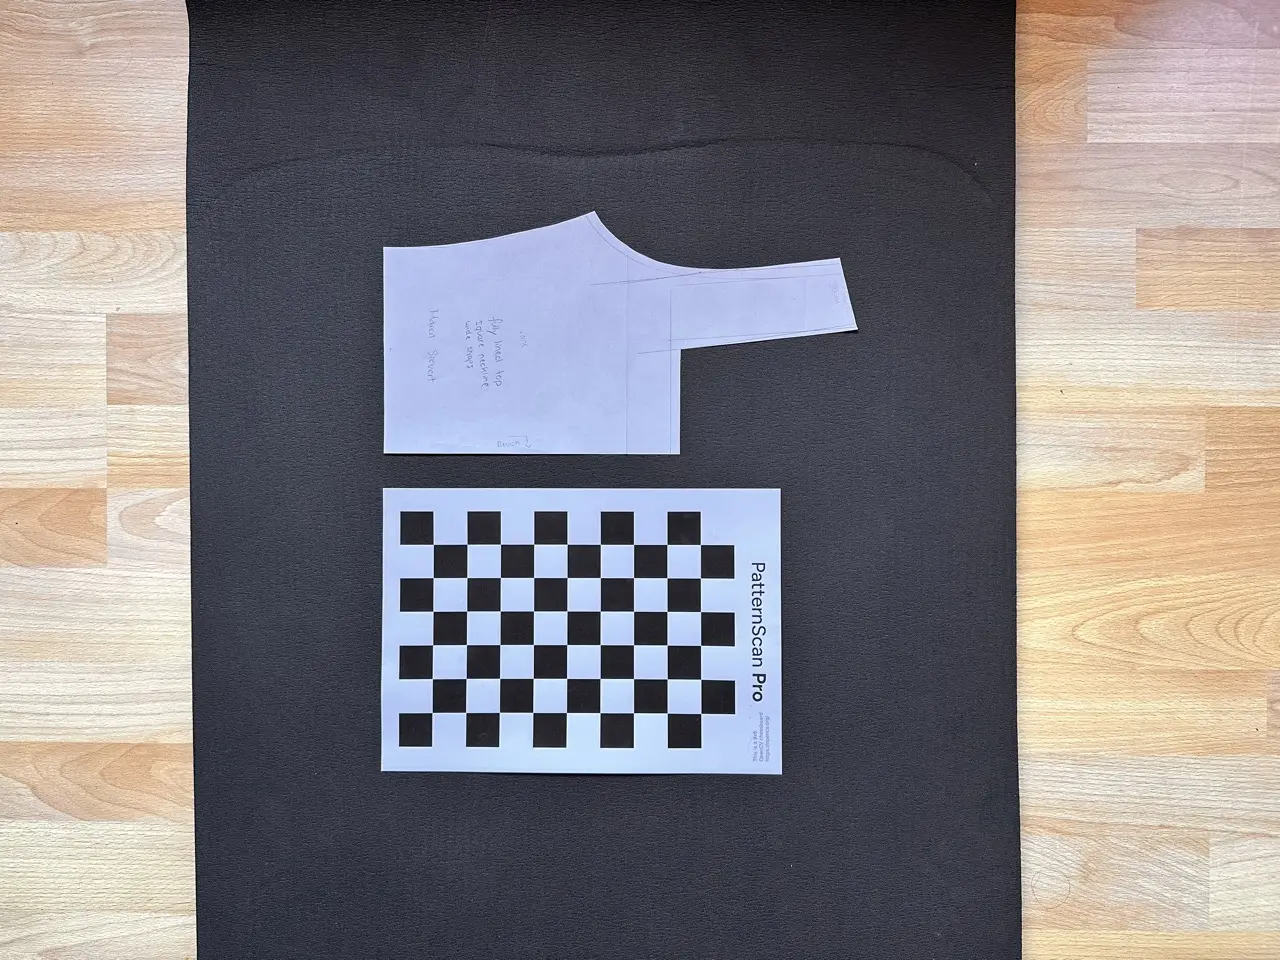
Place the checkerboard reference 2-3 cm away from your pattern when photographing. Both must lie on the same flat surface and be fully visible in the photo.
Photograph from above at a 90° angle with even lighting. PatternScan Pro automatically detects the reference and calculates correct measurements for your pattern. The reference must lie smooth and flat – no waves or creases.
Create a Calibration Profile for Scale-Accurate Measurements.
Digitize sewing patterns without tracing.
Try PatternScan Pro free for one month.
Photograph your paper pattern and get an automatically scaled digital version with PatternScan Pro.